GS1 barcode nomenclature
GS1 nomenclature consolidates multiple pieces of information in a single barcode. Each piece needs to follow a specific barcode pattern—which is a defined format of numbers, letters, special characters, and character length—to ensure proper interpretation of the barcode. By scanning the barcode on an unopened box, GS1 nomenclature can identify the product, lot number, number of units contained, and more.
Set up barcode nomenclature
To use GS1 nomenclature, navigate to the . Then under the Barcode section, check the Barcode Scanner box. Next, select from the default barcode nomenclature options.
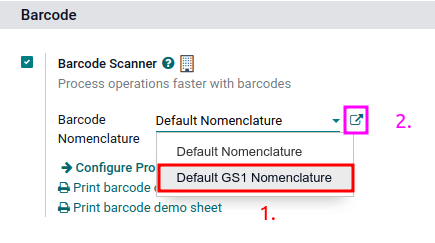
To view and edit a list of GS1 rules and barcode patterns Odoo supports by default, click the ➡️ (External link) icon to the right of the Barcode Nomenclature selection.
Opening the pop-up table provides an editable view of GS1 Rule Names available in Odoo. The table contains all the information that can be condensed with a GS1 barcode, along with the corresponding Barcode Pattern.
Tip
After setting GS1 as the barcode nomenclature, can also be accessed by first enabling developer mode. Navigate to and finally, select Default GS1 Nomenclature.
Use GS1 barcode
To build GS1 barcodes in Odoo, combine multiple pieces of information using the specified barcode pattern. The application identifier (A.I.) serves as the universal prefix for GS1 for barcode identification. Odoo uses regular expressions to describe barcode patterns concisely. Each barcode pattern begins with a required 2-4 digit A.I., which corresponds to the rule defined in the system’s barcode nomenclature list. By including the appropriate A.I. from the list, Odoo can accurately interpret GS1 barcodes. While most barcode patterns have a flexible length, some specific patterns, such as barcodes for dates, have defined length requirements.
Tip
Use the FNC1 separator (x1D) to end the barcode without needing to reach the maximum character
length.
Refer to the GS1 nomenclature list to see a comprehensive list of all barcode patterns and rules to follow. Otherwise, the following section contains examples of how to generate a barcode for common items in a warehouse.
Product + quantity + lot
To build a GS1 barcode for a box that contains a product, number of units in it, and the lot number, the following barcode patterns are used:
Name |
Rule Name |
A.I. |
Barcode Pattern |
Field in Odoo |
|---|---|---|---|---|
Product |
Global Trade Item Number (GTIN) |
01 |
(01)(\d{14}) |
Barcode field on product form |
Quantity |
Variable count of items |
30 |
(30)(\d{0,8}) |
Units field on transfer form |
Lot Number |
Batch or lot number |
10 |
(10)([!”%-/0-9:-?A-Z_a-z]{0,20}) |
Lot on Detailed Operations pop-up |
Configuration
To track products using lots, first enable the Lots and Serial Numbers feature. To do so, navigate to . Next, under the Traceability heading, check the box for Lots & Serial Numbers.
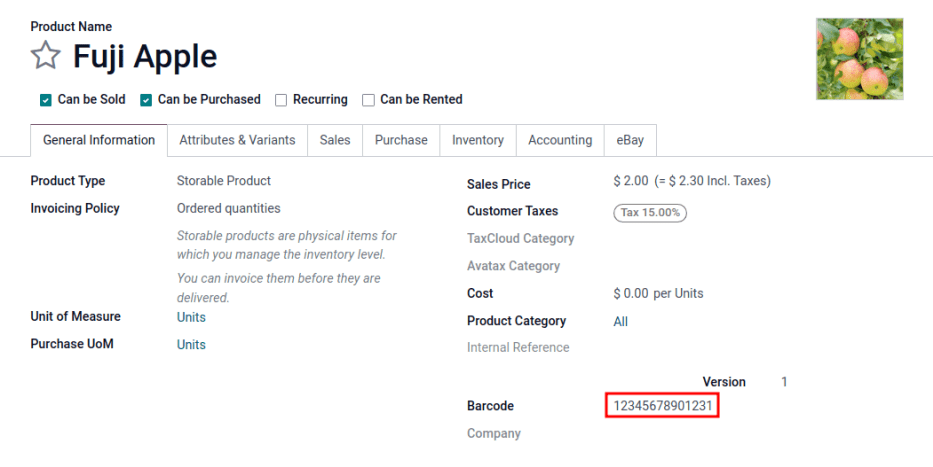
Then, set up the product barcode by navigating to the intended product form in and selecting the product. On the product form, click Edit. Then, in the General Information tab, fill in the Barcode field with the 14-digit Global Trade Item Number (GTIN), which is a universal and unique identifying number from GS1.
Important
On the product form, omit the A.I. 01 for GTIN product barcode
pattern, as it is only used to encode multiple barcodes into a single barcode that contains
detailed information about the package contents.
Example
To create a barcode for the product, Fuji Apple, enter the 14-digit GTIN 12345678901231 in
the Barcode field on the product form.
Tip
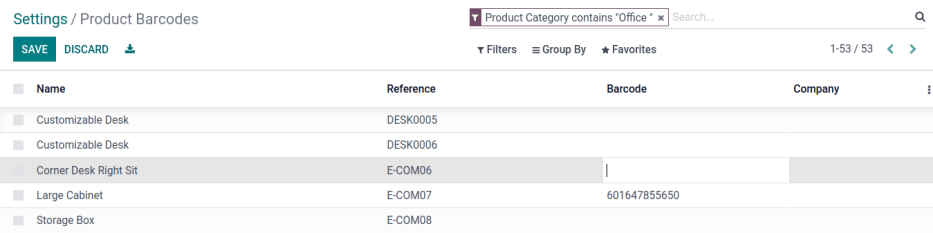
It is also possible to view a list of all products and barcodes. To access this list, go to . Under the Barcode heading, click on the Configure Product Barcodes button under the Barcode Scanner section. Enter the 14-digit GTIN into the Barcode column, then click Save.
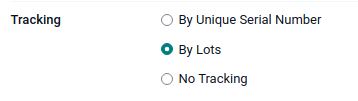
Next, enable lots and serial number tracking on the product. Select the Inventory tab on the product form. Under Tracking, choose the By Lots radio button.
Scan barcode on receipt
To ensure accurate lot interpretation in Odoo on product barcodes scanned during a receipt operation, navigate to the app to manage the receipt picking process.
From the Barcode Scanning dashboard, click the Operations button, then the Receipts button to view the list of vendor receptions to process. Receipts generated from POs are listed, but new receipt operations can also be created directly through the app using the Create button.
On the list of receipts, click on the warehouse operation (WH/IN) and scan product barcodes and
lot numbers with a barcode scanner. The scanned product then appears on the list. Use the
✏️ (pencil) button to open a window and manually enter quantities for specific lot
numbers.
Example
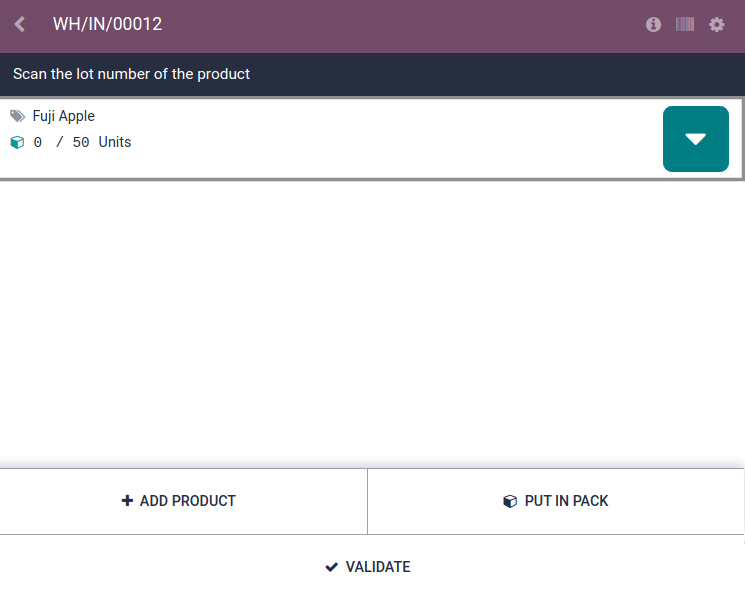
After placing a PO for 50 apples, navigate to the associated receipt. Scan the product barcode, and Odoo will prompt for the lot number.
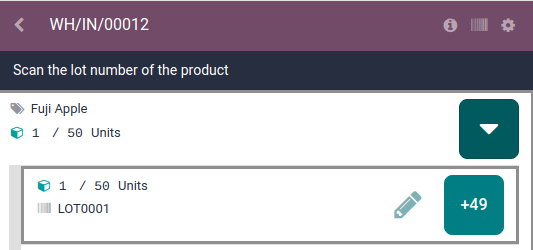
Scan the lot number to process 1 of 50 apples. To avoid scanning 49 remaining barcodes, click the ✏️ (pencil) button next to the desired lot number.
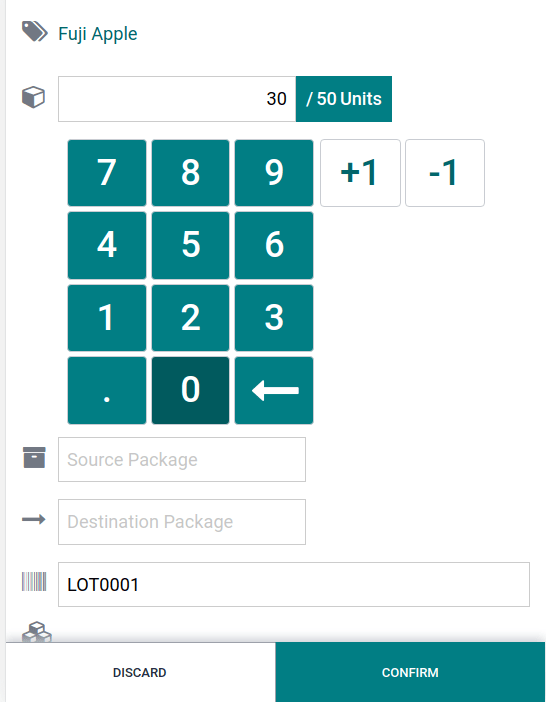
Doing so opens a mobile-friendly keypad page to specify received quantities. Use the keypad to specify the Units for the lot number. When finished, click Confirm.
Repeat this process to specify additional lot numbers and quantities in this receipt. Once the Units are all accounted for, finish the reception by clicking the Validate button.
Alternatively, scan the barcode containing the product, lot number, and quantity to complete the receipt operation in fewer steps.
Product + non-unit quantity
To build a GS1 barcode that contains products measured in a non-unit quantity, like kilograms, for example, the following barcode patterns are used:
Name |
Rule Name |
A.I. |
Barcode Pattern |
Field in Odoo |
|---|---|---|---|---|
Product |
Global Trade Item Number (GTIN) |
01 |
(01)(\d{14}) |
Barcode field on product form |
Quantity in kilograms |
Variable count of items |
310[0-5] |
(310[0-5])(\d{6}) |
Units field on transfer form |
Scan barcode on receipt
To confirm that quantities are correctly interpreted in Odoo, place an order in the Purchase app using the appropriate unit of measure (UoM) for the quantity of products to be purchased.
After the order is placed, navigate to the app to receive the vendor shipment.
Example
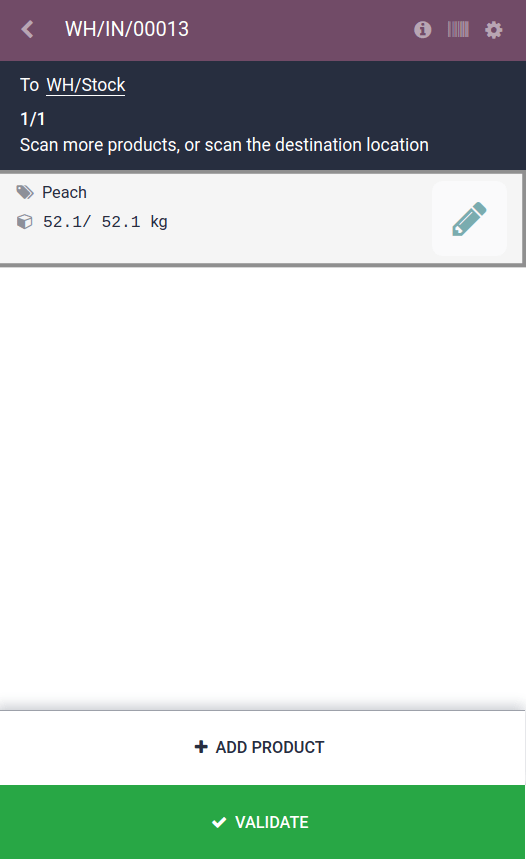
On the receipt in the Barcode app, receive an order for 52.1 kg of peaches by scanning the
barcode. If 52.1 / 52.1 kg appears on the page, this means the reception was
processed without issue. Finally, press Validate.
Note: the A.I. for kilograms, 310 + 1, was used to represent
52.1 kg as a barcode: 000521. This is because the 1 represents how many digits from the
right to place the decimal point.
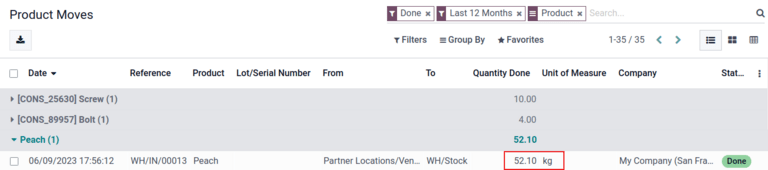
For additional verification purposes, the quantities of received products are also recorded on the Product Moves report, accessible by navigating to .
The items on the Product Moves report are grouped by product by default. To confirm the
received quantities, click on a product line to open its collapsible drop-down menu, which displays
a list of stock move lines for the product. The latest stock move matches the warehouse reception
reference number (e.g. WH/IN/00013) and quantity processed in the barcode scan, demonstrating that
the records processed in the Barcode app were properly stored in Inventory.
Create rules
If a supplier uses a GS1 barcode with a field not supported by Odoo’s default GS1 list, Odoo will fail to interpret the entire barcode. To ensure the complete reading of the barcode, it is necessary to add the missing barcode to Odoo’s list.
Important
While the new field will be read, the information won’t link to an existing field in Odoo without developer customizations. However, adding new rules is still useful to ensure the rest of the fields in the barcode are interpreted correctly.
Begin by turning on developer mode and navigating to the Barcode Nomenclatures list in . Then, select the Default GS1 Nomenclature list item.
On the Default GS1 Nomenclature page, select Add a line at the bottom of the table, which opens a window to create a new rule. The Rule Name field is used internally to identify what the barcode represents. The barcode Types are different classifications of information that can be understood by the system (e.g. product, quantity, best before date, package, coupon). The Sequence represents the priority of the rule; this means the smaller the value, the higher the rule appears on the table. Odoo follows the sequential order of this table and will use the first rule it matches based on the sequence. The Barcode Pattern is how the sequence of letters or numbers is recognized by the system to contain information about the product.
After filling in the information, click the Save & New button to make another rule or click Save & Close to save and return to the table of rules.
Barcode troubleshooting
Since GS1 barcodes are challenging to work with, here are some checks to try when the barcodes are not working as expected:
Ensure that the Barcode Nomenclature setting is set as . Jump to the nomenclature setup section for more details.
Ensure that the fields scanned in the barcode are enabled in Odoo. For example, to scan a barcode containing lots and serial numbers, make sure the Lots & Serial Numbers feature is enabled in Odoo’s settings and on the product.
Omit punctuation such as parentheses
()or brackets[]between the A.I. and the barcode sequence. These are typically used in examples for ease of reading and should not be included in the final barcode. For more details on building GS1 barcodes, go to this section.When a single barcode contains multiple encoded fields, Odoo requires all rules to be listed in the barcode nomenclature for Odoo to read the barcode. This section details how to add new rules in the barcode nomenclature.
GS1 nomenclature list
The table below contains Odoo’s default list of GS1 rules. Barcode patterns are written in regular expressions. Only the first three rules require a check digit as the final character.
Rule Name |
Type |
Barcode Pattern |
GS1 Content Type |
Odoo field |
|---|---|---|---|---|
Serial Shipping Container Code |
Package |
(00)(\d{18}) |
Numeric identifier |
Package name |
Global Trade Item Number (GTIN) |
Unit Product |
(01)(\d{14}) |
Numeric identifier |
Barcode field on product form |
GTIN of contained trade items |
Unit Product |
(02)(\d{14}) |
Numeric identifier |
Packaging |
Ship to / Deliver to global location |
Destination location |
(410)(\d{13}) |
Numeric identifier |
Destination location |
Ship / Deliver for forward |
Destination location |
(413)(\d{13}) |
Numeric identifier |
Source location |
I.D. of a physical location |
Location |
(414)(\d{13}) |
Numeric identifier |
Location |
Batch or lot number |
Lot |
(10) ([!”%-/0-9:-?A-Z_a-z]{0,20}) |
Alpha-numeric name |
Lot |
Serial number |
Lot |
(21) ([!”%-/0-9:-?A-Z_a-z]{0,20}) |
Alpha-numeric name |
Serial number |
Packaging date (YYMMDD) |
Packaging Date |
(13)(\d{6}) |
Date |
Pack date |
Best before date (YYMMDD) |
Best before Date |
(15)(\d{6}) |
Date |
Best before date |
Expiration date (YYMMDD) |
Expiration Date |
(17)(\d{6}) |
Date |
Expiry date |
Variable count of items |
Quantity |
(30)(\d{0,8}) |
Measure |
UoM: Units |
Count of trade items |
Quantity |
(37)(\d{0,8}) |
Measure |
Qty in units for containers (AI 02) |
Net weight: kilograms (kg) |
Quantity |
(310[0-5])(\d{6}) |
Measure |
Qty in kg |
Length in meters (m) |
Quantity |
(311[0-5])(\d{6}) |
Measure |
Qty in m |
Net volume: liters (L) |
Quantity |
(315[0-5])(\d{6}) |
Measure |
Qty in L |
Net volume: cubic meters (m3) |
Quantity |
(316[0-5])(\d{6}) |
Measure |
Qty in m3 |
Length in inches (in) |
Quantity |
(321[0-5])(\d{6}) |
Measure |
Qty in inches |
Net weight/volume: ounces (oz) |
Quantity |
(357[0-5])(\d{6}) |
Measure |
Qty in oz |
Net volume: cubic feet (ft3) |
Quantity |
(365[0-5])(\d{6}) |
Measure |
Qty in ft3 |
Packaging type |
Packaging Type |
(91) ([!”%-/0-9:-?A-Z_a-z]{0,90}) |
Alpha-numeric name |
Package type |